A Deep Cleaning Checklist For You!
With the days getting longer and the weather outside warming up, it is the perfect time to give your home the fresh start it deserves. However, Spring Cleaning is much more than just a tradition to get your home ready for the spring season. It is also the chance for you to declutter, organise and breathe new life into your abode. Whether you are tackling every corner or just focusing on your key living areas, Easylife’s list of spring-cleaning tips is here to keep you on track and make sure that no task goes forgotten. Let’s dive into these essential cleaning tips for your home.

Spring Cleaning Essentials
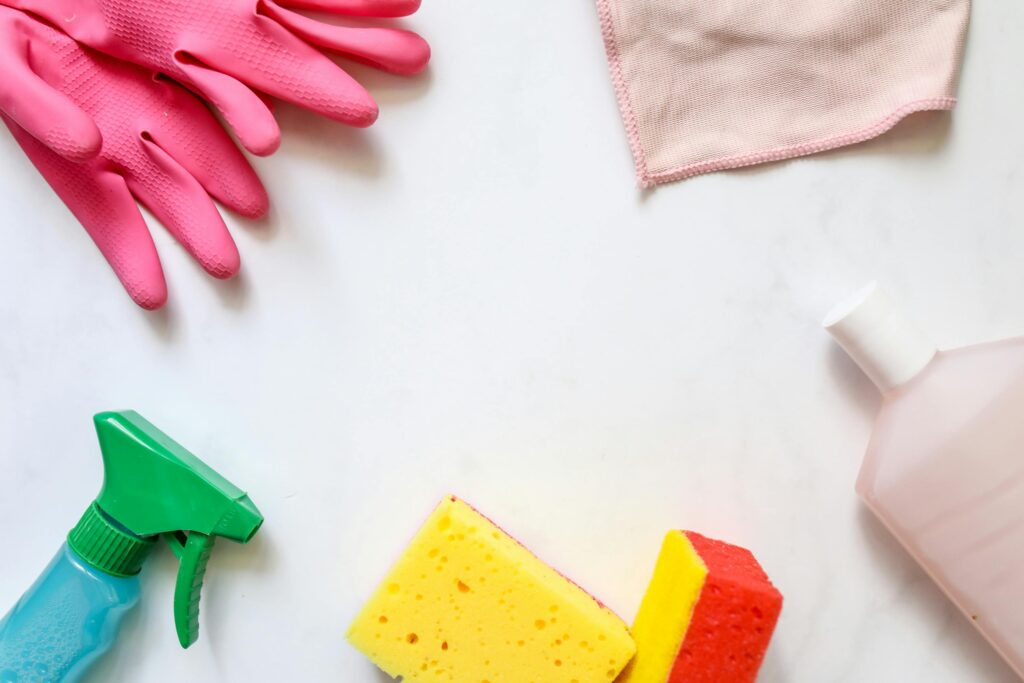
Before diving into the cleaning tasks, it’s important to have the right tools on hand. These essential cleaning products will make the job easier and more efficient:
- Cleaning Sponges
- A Squeegee
- A Daily Shower Cleaner
- Broom & Dustpan
- Skirting Board Cleaner
- Eco-Drain Cleaner
- 60-Second Stain Remover
- Heated Clothes Airer
General Spring-Cleaning Tips
The first step to refreshing and resetting your home is to start with general cleaning tasks. These foundational steps create a cleaner, more inviting space, ensuring that every room feels fresh. Here’s where to begin:
1. Dust All Surfaces
The most important general cleaning tip for anyone to follow when they are starting to clean is to make sure that you have dusted and wiped down all surfaces in your home as dust can tend to collect on all surfaces after a long cold winter. You can easily stop this from happening by using one of Easylife’s multilayer cleaning sponges and an antibacterial cleaning agent to remove any dust from your home.
2. Sweep Floors & Rugs
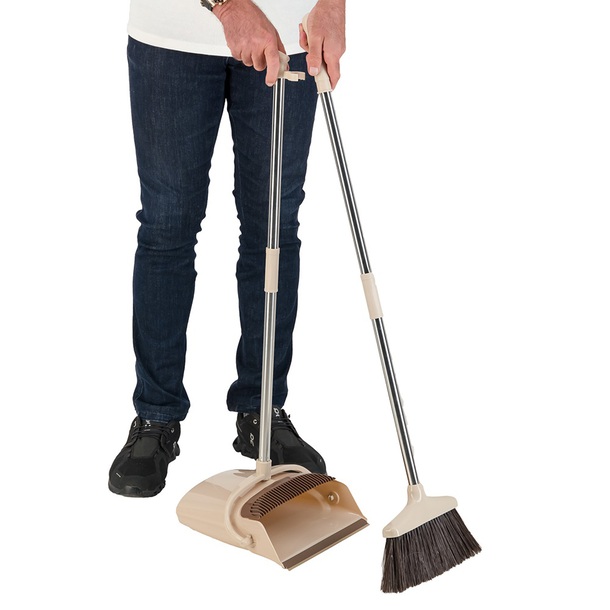
The second step on your spring cleaning checklist is to make sure that you have sufficiently vacuumed all your floors and rugs. These surfaces are the most used surfaces in your home and as a result can collect the most dust and dirt. You can stop this by happening by using a broom and dustpan to sweep these surfaces and collect any unnecessary dust that may have collected in your home.
3. Clean Windows & Mirrors
The third general cleaning step to follow when you are spring cleaning is to clean your windows and mirrors. Ensuring that they are free from dust, smudges, and streaks. As over time your windows collect dirt, pollen and grime, whilst your mirrors can accumulate fingerprints, and water prints. You can make sure that this is cleaned by dusting off any loose grime using a microfiber cloth and then use a window cleaner to remove any streaks. It is worth mentioning that you can make this even easier by using one of Easylife’s wonder Squeegee.
It is also really important to ensure that you clean your window sills, tracks or frames as these areas can also accumulate unnecessary dust and dirt. You can easily remove this by using one of our 2-in-1 Window Track Cleaning Brush or a crevice cleaning brush. Ensuring that your windows and mirrors remain spotless.
4. Wipe Down All Walls
The fourth step in ensuring that your general spring clean goes well is to make sure that you have wiped down your walls. This is because walls are oftentimes not the first that comes to mind when cleaning your home. However, they are a major contributor to the cleanliness of your home as they can collect dust, fingerprints & stains over time. You can stop this by ensuring that you have wiped down your walls with a cloth to remove any loose dust. Additionally, for high-traffic areas you can consider using a damp cleaning sponge to wipe around light switches and other high touch elements.
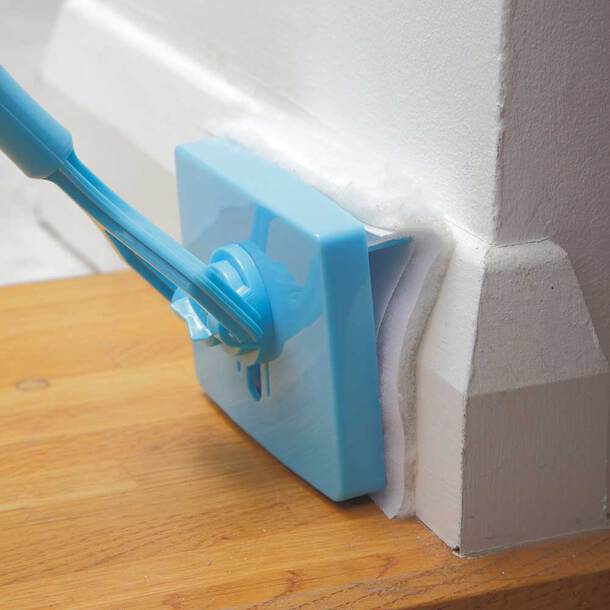
Another thing to consider when cleaning your walls, is to make sure that you pay extra attention to your baseboards and corners. You can make sure that these areas are cleaned by making use of our skirting board cleaners. By doing this you can ensure that your walls are spotless for spring.
5. Clean Light Fixtures
Another problematic yet often overlooked area when spring cleaning your home are your light fixtures. They are problematic as they can collect dust, grime and cobwebs, which can dim their brightness over time. To restore their shine, you can start by turning off your power to ensure that you can safely clean these fixtures. Once the power is off you can then use a microfiber cloth or duster to remove any loose dust from your ceiling lights.
When cleaning your plastic or glass lampshades, you must first carefully remove them before wiping them down with warm soapy water. Also don’t forget to clean your lampshades and ceiling fans, as they are also a big culprit that gathers dust.
6. Deep Clean Your Carpets
The last step in your general spring-cleaning checklist is to make sure that you deep clean your carpets. This is because over time your carpets can tend to trap dust, dirt, allergens and even odours, making a deep clean essential to ensure that your home stays healthy and fresh. You can start this process by first vacuuming thoroughly, paying extra attention to high traffic areas and any areas that may go under furniture.
To ensure that your carpet is sufficiently deep cleaned you can use a carpet cleaner, carpet dry cleaning powder or a stain remover to lift embedded dirt and stains. Once done, make sure that your carpet is sufficiently dried before placing it back in your home to ensure that there is no chance of mould or mildew building up in your home. You can easily treat this by using a mildew and mould genie.
Shop Our Kitchen Cleaning Products
Kitchen Cleaning Tips
With the general cleaning tasks complete, it’s time to focus on the heart of your home—the kitchen. As your kitchen is oftentimes the busiest place in your home, it can see the most traffic and ultimately the most mess. Whether it’s your family doing meal prep, or preparation for family gatherings. Your kitchen is sure to be a hotspot for hidden dirt and grime. However, you can combat this by following our key spring-cleaning tips and hacks to make sure that your kitchen sparkles this spring.
Now that we understand the importance of kitchen cleaning, let’s break it down into simple, effective steps:
1. Deep Clean Your Fridge
Your fridge, like your kitchen, works hard all year round. From keeping food fresh to ensuring that it is safe to eat. However, over time unnecessary spills, expired items, and spoiled food odours can build up, making it essential to ensure that your fridge receives a deep clean during your spring-cleaning routine.
You can ensure that your fridge is sufficiently deep cleaned by first making sure that you have emptied your whole fridge, whilst checking expiration dates and throwing away any spoiled or expired goods. Once this is done you can then remove your fridge shelves and drawers, and wiping them down with warm, soapy, water to eliminate any residue or bacteria. You can also wipe down the interior with a food safe cleaner to remove any unnecessary stains or odours.
It is also incredibly important to ensure clean the door seals, as crumbs and leftovers can get trapped in these areas. You can also make sure that your fridge has no weird odours by placing an open box of baking soda to remove any smells that may linger.
2. Wipe Down Kitchen Cabinets
Once you have cleaned out your fridge, the next step in the spring clean of your kitchen lies in making sure that you have cleaned out and wiped down your kitchen cabinets. Although these kitchen cabinets may be an essential to organise your home, they can also be prime real estate for dust and dirt to gather in your kitchen.
This is because over time, cooking splatters, spills and even dust can accumulate on your cabinet surfaces. However, before you get started on cleaning your kitchen cabinets you will need to clear out any clutter. Once this has been done you can then use a warm dirty microfiber to wipe away any loose crumbs or dust from the outside & inside of your cabinets. Now that your cabinets are free from loose crumbs, you can then use a damp cloth to clean the insides of your cabinet.
It is incredibly important to also make sure that you have also wiped down your cabinet doors and hinges to give them an extra deep clean.
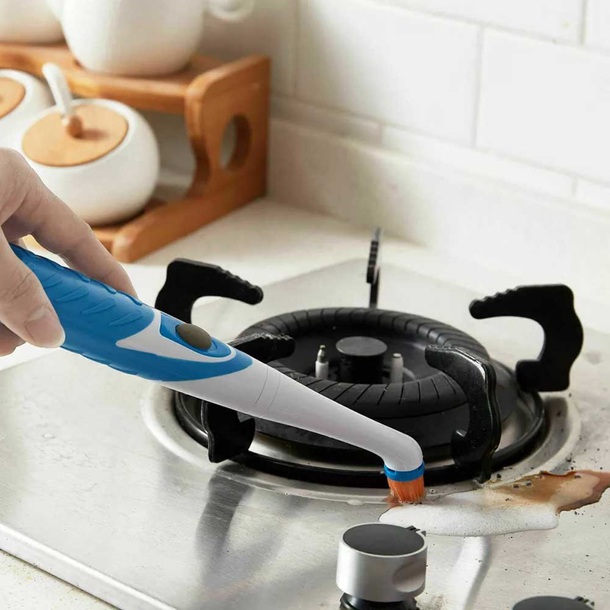
3. Clean Oven & Stove Top
Another incredibly busy space in your kitchen that receives almost as much activity as your fridge is your oven or stove. Like most of the other appliances in your home, over time dirt, spills and stains can accumulate on your stove. Causing your kitchen to not only look less pristine but also making it an unpleasant place to be. These messes make giving your stove a spring deep clean a necessity to ensure that your kitchen is spotless all year round.
You can start the deep clean of your oven by first removing oven racks, trays and any other removable parts from inside your oven. Each of these items can be separately cleaned, with a quick cleaning tip for oven racks and trays is to soak them in warm soapy water for 15-20 minutes.
Now that these parts are clean you can start to clean the interior of your oven. You can do this by using an easy-to-use oven cleaner spray that can be sprayed or applied to the interior of your oven. After you have left this cleaning spray to sit in your oven, you can then scrub the interior using a plastic scraper or scouring pad. Once this is done you can then wipe down the interior of your oven with a damp cloth or a microfiber sponge.
With the interior of your oven now spotless and clean you can then move onto cleaning the oven door and stove top. You can easily clean the door by using the same oven cleaner spray and letting it seep into deep grease marks or stains and then wiping them away with a damp cloth.
To clean your stove top, you will need to remove any of the greasy burner grates and knobs, and placing them in hot soapy water. This will help break down tough grease stains and make sure that these elements are spotless. Once you have done this you can use an antibacterial cleaning spray to wipe down your stove top to remove any excess grease or dirt that may have built up over time.
4. Wipe Down Kitchen Counters
With your oven and stove now spotlessly clean, the next task in your spring-cleaning checklist to make sure that you have sufficiently wiped down and cleaned all of the counters in your kitchen. This task is essential as these areas are the most spill prone with them being used for meal prep and other everyday tasks dirtying them. Wiping down your kitchen counters not only provides a way to remove visible dirt from your kitchen, but also to help eliminate germs, bacteria and crumbs that can attract pests into your home.
You can stop this from happening by ensuring that you first remove any clutter from your kitchen counters. Dishes, appliances, and food containers are all some of the main culprits that hide unseen dirt on your kitchen counters. Once they have been removed you can use a damp cloth with a cleaning spray to wipe down all surfaces. It is worth mentioning that to make sure your counters are spotless; you should focus on giving extra attention to high touch areas on your kitchen counter.
5. Sanitize Your Kitchen Sink
Another step to consider on your spring-cleaning list whilst giving your kitchen a deep clean is to make sure that you have sufficiently cleaned and sanitised your kitchen sink. This is due to the kitchen sink not only being used to wash dishes, but it is also the main space in the kitchen where you handle raw ingredients. Making it on the biggest hot spots for bacteria and germs to build up in your home.
To ensure that you stop this from happening and give your kitchen the necessary deep clean, you can do this by first emptying your sink and removing any dish or debris that may limit the space you need to clean your sink.
Once you have done this you can then fill a bucket with hot, soapy water and grab a cloth to clean your sink. It is important to make sure that you wipe the whole surface of the sink to remove the buildup of any food particles, dirt or stains that may collect in your sink. You can also pop in a drain cleaner pod to further remove any debris that may be stuck in your drains.
Now that you have cleaned out the whole of your sink and drain, you can then focus on ensuring that you sanitise the sink with a disinfectant spray. It is also incredibly important to make sure that you have also disinfected your faucet and taps, as these areas are mostly forgotten when giving your home a necessary spring clean.
6. Clean Your Microwave
The microwave is one of the most versatile and used appliances in your kitchen, and this use can lead to it accumulating dirt and grime over time. Food splatters, and spills happen frequently, and this can cause your microwave to not only accumulate grime but also impact its performance. This buildup of grime makes cleaning your microwave an essential step on your spring-cleaning checklist.
The first step in giving your microwave a deep clean lies in first making sure that it is safe to clean it. You can do this by first unplugging your microwave from the wall, and removing the turntable and any other removable parts. You can place these parts in warm, soapy water or in the dishwasher (if they are dishwasher safe) to remove any excess grime or stains.
The next step is for you to give the interior of your microwave a wipe down with warm soapy water. This is to remove any tough stains from the walls and ceiling of your microwave. It is also important to make sure that you wipe down the door of the microwave to remove any smudges or fingerprint marks. Once you have wiped it down you can then santise and dry the microwave to ensure that it is completely dry and clean.
7. Empty Your Rubbish Bins
The final step in your kitchen spring clean checklist is one of the easiest and most-effective ways to keep your kitchen clean. This step is emptying your rubbish bins. Although this step may seem incredibly simple, it is still incredibly crucial to make sure that your kitchen bins are properly cleaned.
You can do this by first removing the rubbish bags from your kitchen bins and placing them in an outside rubbish area. Now that the bag has been removed you can then rinse the inside of your rubbish bins by using warm soapy water to remove any loose debris that may be in your bin. Once you have rinsed them, the next step is give your bins a scrub with a cleaning solution. It is advised to focus your scrubbing on the bottom and sides of your rubbish bin to remove spills and sticky residues.
Now that your bin has been scrubbed, you can then focus on disinfecting the bin with disinfectant spray to stop the buildup of unpleasant odours and bacteria in your bin. When sanitising your bin, it is important to make sure that you clean the handles and lids of your bin as these are the most touched areas of your bin. Once this has been done you can then place in a new rubbish bag.
Bedroom & Living Room Cleaning Tips
Your bedroom and lounge should be an inviting space that is incredibly comfortable & free from dust and other allergy causing dirt. A thorough spring clean can refresh and revitalise these spaces. Making them feel much brighter and more relaxing. Here are our quick tips on how to tidy up, declutter and maintain a fresh space in the most lived in areas of your home.
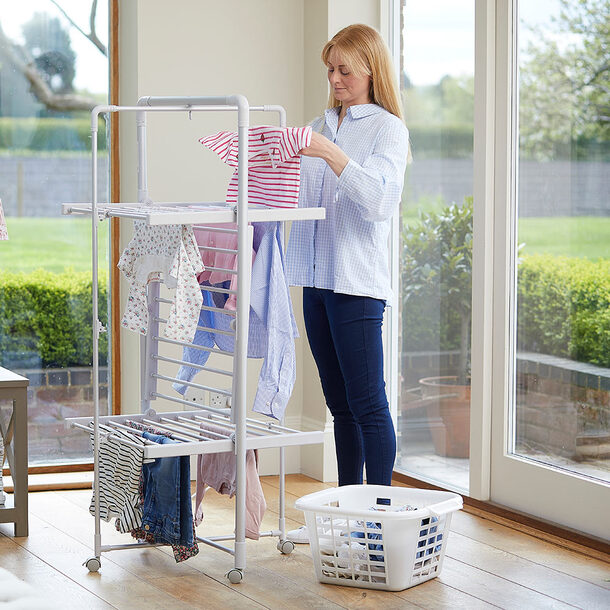
1. Wash Your Bedding
The first step in spring cleaning your bedroom is to make sure that you have thoroughly washed your bedding. This is important as over time your sheets, duvets, and pillowcases can accumulate sweat, body oils, dirt and allergens that can not only make your bedroom look dirty but also impact your sleep quality.
You can stop this from happening by making sure that you first strip off all of the bedding from your bed and popping it in the wash. Additionally, if you want to give your bedding a proper deep clean you should also follow the care instructions on pillowcases and duvets. It is also incredibly important to make sure that you give your bedding the right wash, and that you give it enough time to dry. If you have limited space to dry then you may want to also consider a heated clothes airer to make sure that your clothes are completely dry.
2. Dust All Your Furniture
Once your bedding is clean and fresh, the next step is to tackle your bedroom and living room furniture. This is essential as dusting your furniture is a great way to not only keep your home looking pristine, but also to ensure that no dust mites or pollen can build up in your furniture.
The first step in stopping this from happening is to first make sure that you have the necessary tools to clean your furniture. It is crucial to ensure that you have a microfiber cloth & a soft feather duster, as these tools are essential to helping ensure that you are ready to clean.
Dust Furniture First
With your tools in the hand the next step is to make sure that you focus on furniture first. You can do this by making sure that you have dusted any shelves, dressers or nightstand. Making sure that you have sufficiently wiped down all surfaces. It is also worth mentioning that small touches matter, and you also need to wipe down the sides and back of your furniture.
Don’t Forget the Upholstery
Now that you have sufficiently cleaned all the furniture in your living room or bedroom. The next step is to make sure that you sufficiently clean the upholstery of your couches, chairs and cushions, as these items are magnet for dust. It is advised that you clean these items with a vacuum to suck up any dust. Alternatively, you can consider the use of sofa or chair covers to protect your furniture from accumulating dust.
3. Wash & Dry Your Curtains
Like the other furniture in your bedroom or living room, your curtains can also accumulate dust, dirt and allergens over time. Making your home not only feel incredibly dirty, but also majorly impact the air quality of your home. It is this reason that highlights how important it is for you to give your curtains a deep clean.
You can start this process of deep cleaning your curtains by first checking the care label of your curtain. This is important as the material of your curtains may require different cleaning methods to ensure that they are not damaged when being washed. Once you have checked the care label, the next step is vacuum your curtains to make sure that you remove any loose debris or dirt from them.
With the dirt now loosened, you can then pop your curtains into your washing machine to give them a wash. It is also worth mentioning that you can add a soft detergent to both soften your curtains and stop them from fading. As soon as your curtains are cleaned, you will need to make sure that they are dry, when this happens you can then hang up your newly cleaned curtain.
4. Organise Your Clutter
Clutter, like dust and dirt, can make the space in your home feel chaotic and overwhelming. So, taking the time to organise your home can make into a more relaxing and functional environment. You can start this by sorting through items in your home and choosing what you really need. A quick way to do this is to make use of the three box method. This method entails using three boxes when decluttering your home – one for items to keep, one for donations and one for things to discard.
Additionally, you can invest in storage solutions like baskets, shoe racks or shelving units to keep everything organised and tidy. By making use of vertical spaces, you can minimize the use of floor space to maximise clutter storage. It is also worth mentioning that if paperwork has piled up then you may consider a document case to keep this clutter close at hand.
Bathroom Cleaning Tips:
Like the kitchen, the bathroom is one of the most frequently used areas in the home. Making it essential to keep it hygienic, fresh and free from limescale. A clean bathroom not only promotes a healthy environment of a clean home, but also contributes to the overall appeal of your home. Luckily, with a little preparation and the right cleaning products, keeping your bathroom sparkling clean can be a manageable task.
Here’s an in-depth list of bathroom spring cleaning tips to ensure that your bathroom stays spotless this spring.
1. Clean Your Bathroom Floors
Your bathroom floors are one of the areas that accumulates the most dirt, moisture and grime. Making it essential to clean it regularly as part of your spring cleaning routine. Whether you have tiles, vinyl, or laminate flooring, the approach to cleaning may differ slightly, but the goal remains the same. To leave your bathroom floor sparkling clean and free from dirt and bacteria. Here’s how to do it effectively:
The first step is to remove all obstacles, such as bathroom rugs or any bathroom furniture, from your bathroom floor. This will give you the space you need to access every corner and crevice of your floor with no spot left behind. Once you have done this, the next step is to sweep your bathroom floors with a broom to remove any crumbs, dust or dirt. Additionally, if your bathroom has tiles or grout lines, you may want to consider using a grout pen to clean grout lines.
As soon as your floor is clear of debris, the next step is to pick an antibacterial floor cleaner and apply it to your floor. When it has been applied, the next step is to use a mop to remove any stains from your bathroom floor. You can also consider putting down a super absorbent bath mat to stop any future spills on your bathroom floor.
2. Wipe Down Your Showerheads & Faucets
In addition to cleaning your bathroom floors, the next step on your bathroom spring cleaning checklist is to ensure that your bathroom’s shower heads and faucets are spotless. As over time mineral deposits, water stains & soap scum can build up on these fixtures. Leaving them looking dull and impacting their performance. By regularly giving your showerheads & faucets a spring clean you ensure that your bathroom stays spotless no matter what.
You can give your bathroom faucets and showerheads a clean by soaking them in a natural cleaner that aims at breaking down these build ups. After you have soaked these faucets in this cleaning solution, the next step is to use a toothbrush or microfiber cloth to wipe away this grime. Leaving your faucets and showerheads spotless and sparkling.
3. Deep Clean Your Toilet
Similar to your bathroom shower head and faucets, your toilet is a high use area that makes cleaning it an essential step on your spring clean. To ensure that your toilet is sparkling clean, but also hygienic, here’s how to tackle cleaning your toilet.
The first step in deep cleaning your toilet is to first focus on cleaning your toilet bowl. You can start this by first applying an antibacterial cleaning solution to the inside of the bowl. Being sure to cover the entire rim, under the rim and down the sides. Additionally, if your toilet has tough mineral stains, a pumice stone can be gently used to scrub them away without damaging your toilet.
While you let the toilet cleaner soak into the bowl, you can then use a toilet cleaning brush to give the bowl an even deeper scrub. To be even more thorough, you can then scrub your toilet handle and tank to give those hard-to-reach sections a little attention. After you have done this, the final step is to then wipe down the toilet base, toilet seat & lid to ensure that all the grime is cleaned from your toilet.
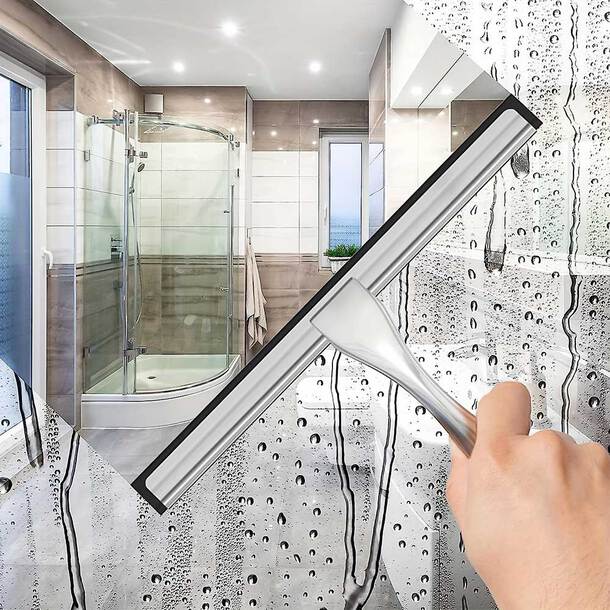
4. Wipe Down Your Shower Doors
Now that your bathroom surfaces are shining, it is important to not forget about the most visible areas in your shower: your shower door. It is often overlooked, but giving your shower door a regular cleaning is an essential step for maintaining a fresh, sparkling bathroom look. This is because the glass can accumulate soap scum, water stains, and grime that can leave it looking cloudy and dirty. However, you can stop this from happening by following these steps.
The key step to cleaning your shower door starts with spraying your shower cleaner across the glass door, making sure it spreads across the whole surface of the door. It is advised that you allow the cleaner to sink on areas with soap spots or water stains. Once it has sat for a while, the next step is to use a squeegee on your shower door, wiping down to stop grime from building up on its surface. It is also worth mentioning that you should use a rail cleaning brush to further remove the dirt build up in the door rails.
5. Organise Your Bathroom Cabinets
After ensuring that your bathroom surfaces and shower doors are spotless, it is time to turn your attention to one of the most cluttered spaces in your bathroom: your bathroom cabinets. An organised bathroom cabinet not only creates a more functional space, but also contributes to a cleaner and less stressful environment. It’s easy for bathroom essentials, toiletries & cleaning supplies to pile up, but with a little effort you can keep everything neatly stored and organised in your bathroom cabinets.
You start the process of organising your bathroom cabinets by emptying out your bathroom cabinets entirely. Giving you the opportunity to both take stock of what you have and determine what’s worth keeping and what can be thrown out. Some of the things to consider throwing away include expired medications, old makeups and half used products are all key items that should be thrown away. Once this is done you can then wipe down your bathroom drawers to clean up any leftover dirt or debris. With your drawers wiped down, you should now have a spotlessly clean bathroom cabinet.
Ready To Tackle Spring Cleaning in Your Home?
With these spring cleaning tips, your home will feel fresher, brighter, and more organised. The right tools make all the difference—explore our selection of home cleaning essentials to make spring cleaning easier and more effective!